

Estimated Time to Complete this Section: 5 Minutes
Customizing your Welcome Message & Image or Logo
Digital PTO makes it easy to add a text welcome message as well as upload an image (or as many as you would like) to your Sidebar. You will want to change your Sidebar Welcome Message as well as upload a photo of your school or even your schools’ logo.
Live Website Reference: Welcome Message & Photo
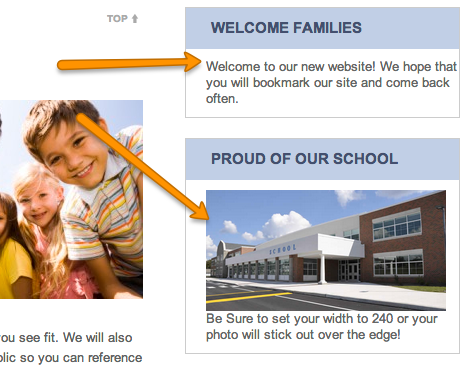
This tutorial covers changing the welcome message and image at the top right of every page on your website. Above is the example of the default set up.
The message and image are located within your widgets as explained below.
Go to APPEARANCE > WIDGETS

To Access your Widgets, head to APPEARANCE > WIDGETS
Click the Downward Arrow on Welcome Families Widget
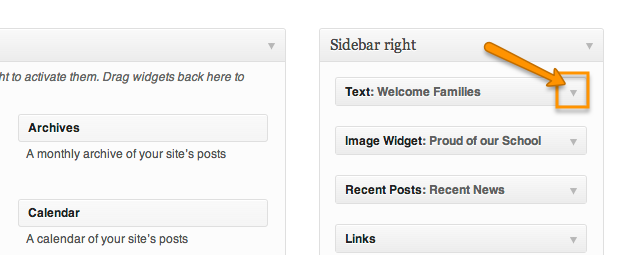
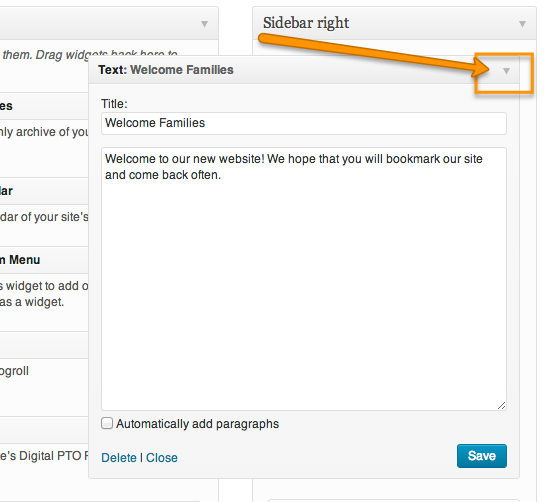
Click the arrow to the right of the Text: Welcome Families Widget. This will expand the widget for editing.
Make any changes desired

Feel Free to change the Title and Content of this field. Try to keep the text field to a maximum of 3 lines for best appearance. When you are finished, click the SAVE button to record your changes.
Click the Arrow Again to Shrink the Box
Click the downward arrow again to shrink the box back up.
Click the Arrow next to Image Widget
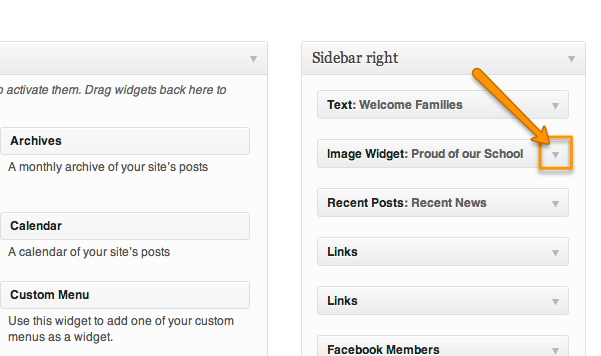
Click the downward Arrow to the right of the Image Widget now. This will expand the image widget options.
Click Select Image to Add New Image
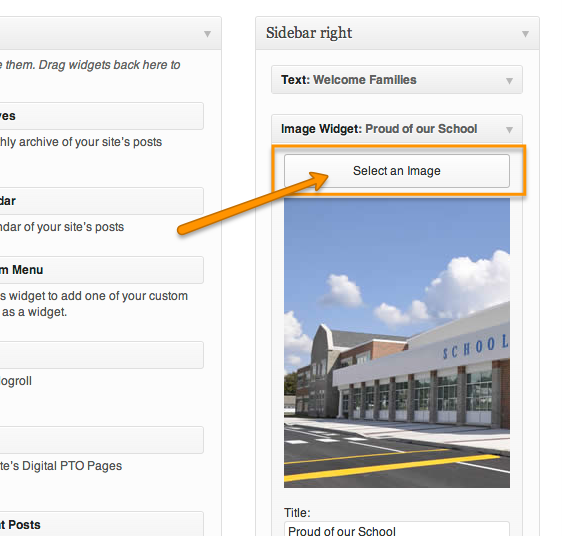
Click the SELECT AN IMAGE button to select a new image. This works well as either your school logo or a photo of your school.
In Upload Screen, Click Select Files
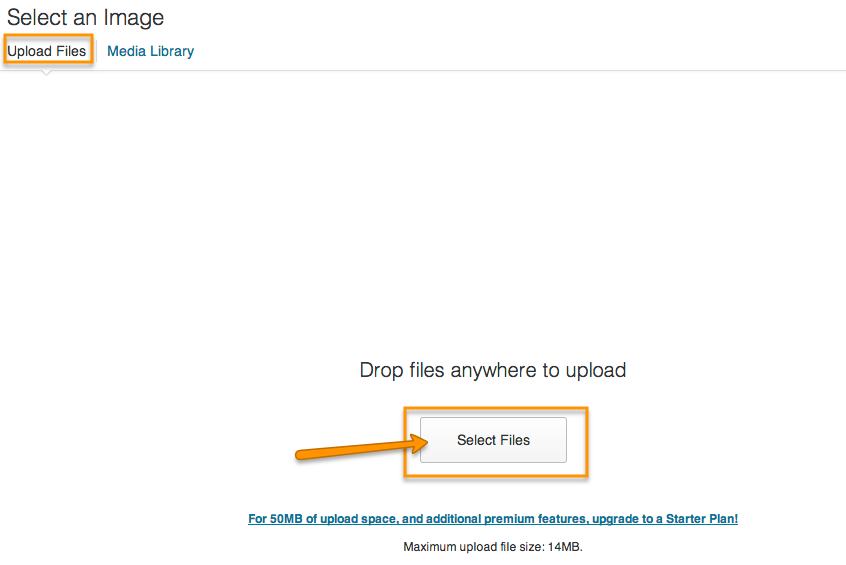
Be sure you are in the Upload Screen (you probably already are) and then click the SELECT FILES Button. This will open up a window to allow you to find the photo you with to upload on your computer. When you find the image you wish to use, click OPEN.
Verify Image and click Insert Into Widget
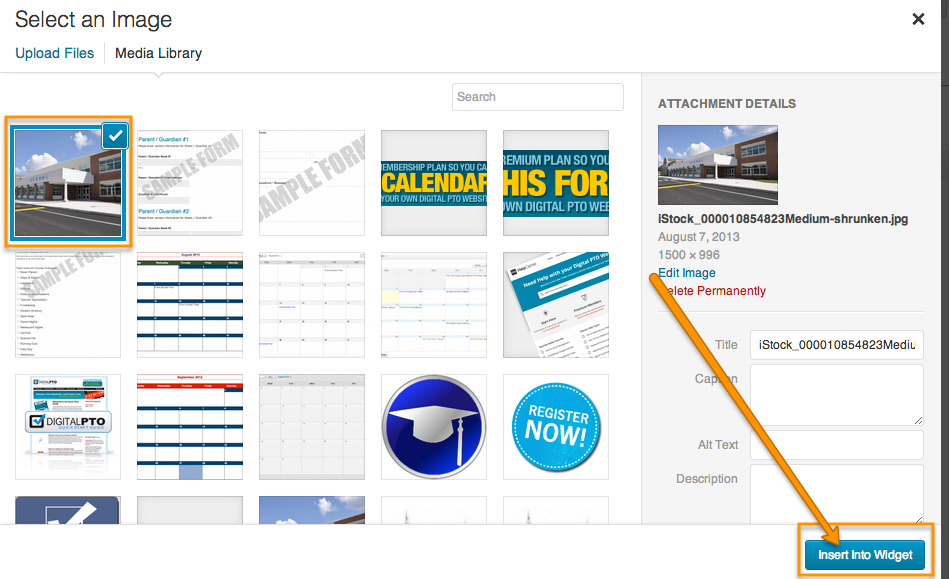
Once your image uploads, make sure it’s the right image and then click the INSERT INTO WIDGET button.
Note: Don’t worry if your image is too large, we’ll adjust that shortly.
Change Title as Desired
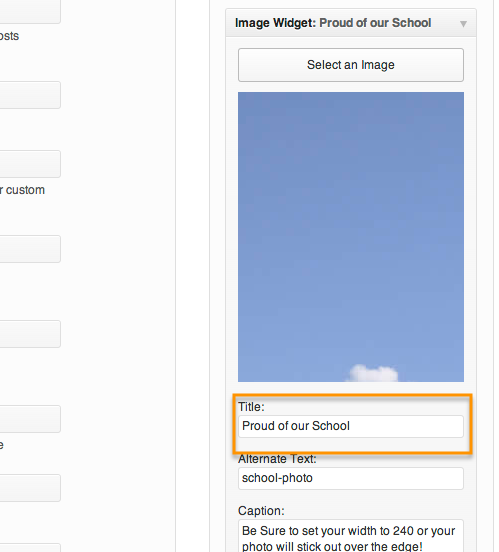
Change the Title of the Image if desired.
Change the Caption as Desired
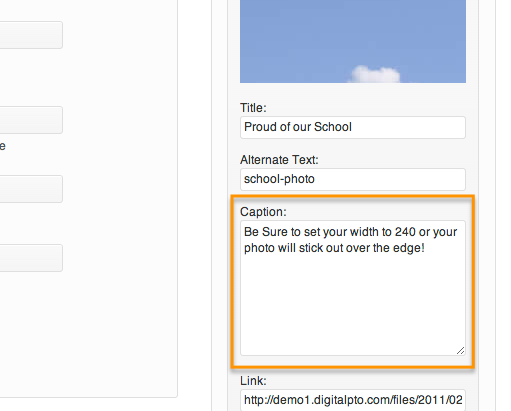
Change the text that will appear under the image (CAPTION) as desired. Keep it short!
Change Link as Desired

By default, the image will link to a larger version of the image when you click on it. If you would like to change where clicking on the image leads, you can enter it in the LINK field.
Change SIZE to CUSTOM
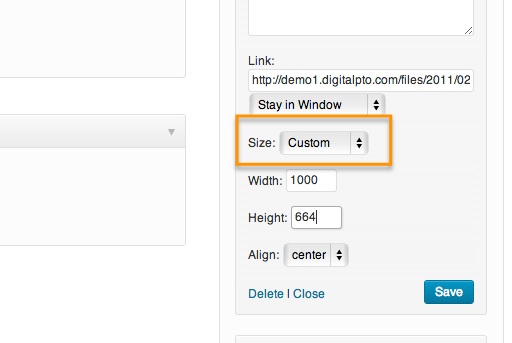
More than likely, your image is too big to fit in the sidebar, so change the Size option to CUSTOM. This will allow you to enter your own dimensions.
Change the Width to 240
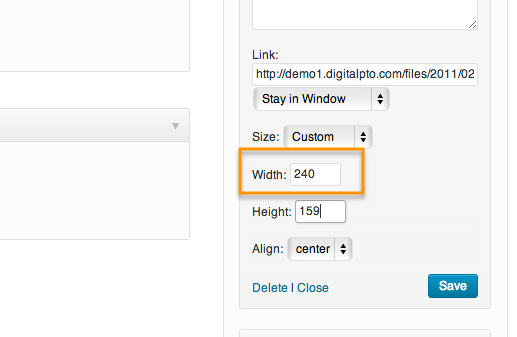
If you are using the default Starter 2012 theme, they you want to make your Image Width 240. The Height will automatically change based on your width settings. If you are using a different them you may have different dimensions that will fit better.
Set the Alignment to CENTER and SAVE
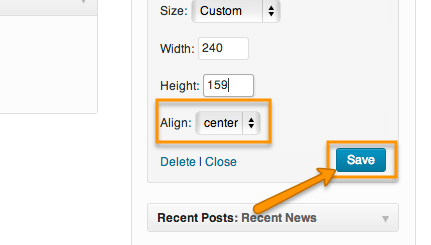
Make sure your Align setting is set to CENTER and then click the SAVE button to record your changes.
Review your changes
Head to your live site and make sure that the changes you just made look right! If they are correct, you’re ready to move on to the next step!